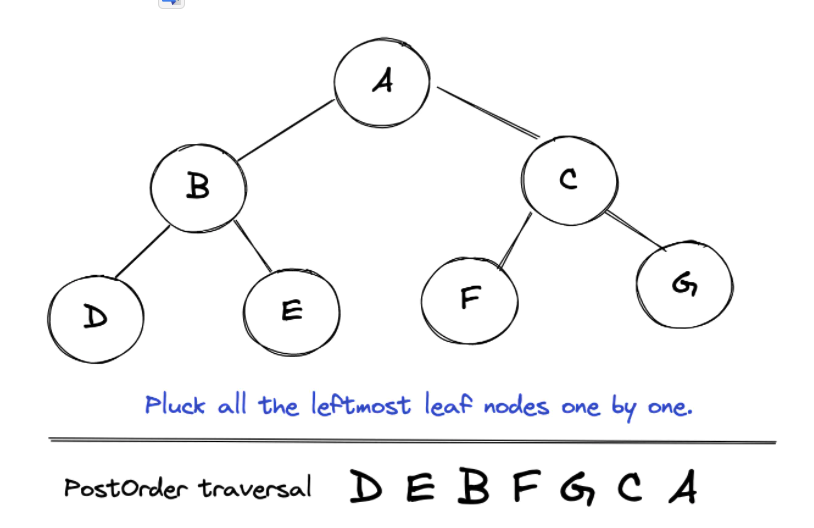
到目前为止,我们已经了解了一些二叉树遍历的方法:
- 使用递归和迭代算法遍历二叉树
- 使用父指针遍历二叉树
在本文中,我们将把这些知识用于 n 叉树,即 DOM。我们将看到如何使用各种 CSS 选择器定位 DOM 元素,而无需使用内置 API,如 getElementById、getElementsByClassname 或 querySelector/querySelectorAll。因此,本文将阐明这些 API 可能如何在幕后工作。
DOM 遍历
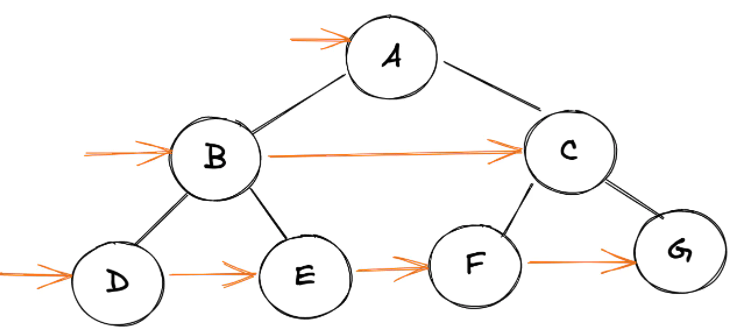
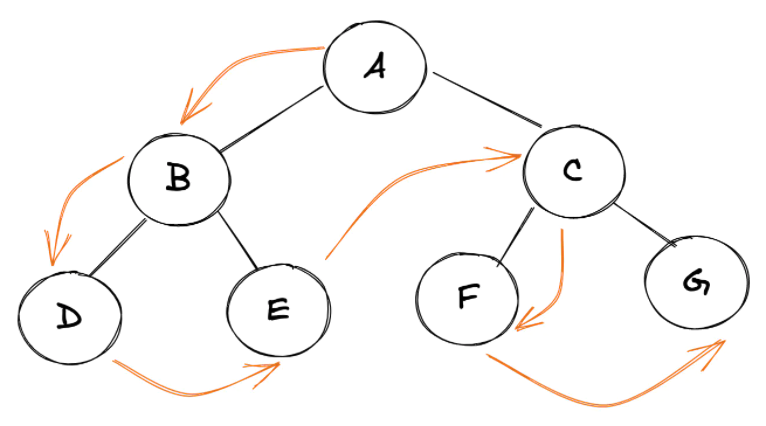
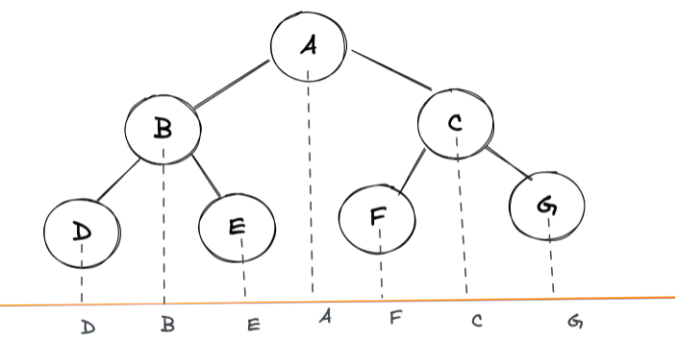
借用 使用递归和迭代算法遍历二叉树的思路,我们来得出DOM的前序遍历算法:
function walkPreOrder(node){
if(!node) return
console.log(node)
for(let child of node.children){
walkPreOrder(child)
}
}
我们可以修改这个算法使之来返回一个迭代器:
function* walkPreOrder(node){
if(!node) return
yield node
for(let child of node.children){
yield* walkPreOrder(child)
}
}
for(let node of walkPreOrder(root)){
console.log(node)
}
我们可以使用任何广度优先或深度优先算法(在之前的文章中讨论过)来遍历 DOM。
我们还假设正在处理具有以下 HTML 的文档:
<html>
  <head>
    <title>DOM selection algorithm</title>
  </head>
<body>

  <div class="container">
    <div class="body">
      <div class="row">
        <img id="profile" src="xyz.jpg" alt="">
      </div>
      <div class="row"></div>
      <div class="row"></div>
    </div>
  </div>

</body>
</html>
通过 ID 定位节点
function locateById(nodeId){
for(let node of walkPreOrder(document.body)){
if(node.id === nodeId){
return node
}
}
return null
}
我们可以使用 locateById() 函数如下:
const img = locateById('profile')
通过�ClassName 定位节点
浏览器提供 document.getElementsByClassName() API 来实现此结果。我们如何实现类似的东西:
function locateAllByClassName(className){
const result = []
for(let node of walkPreOrder(document.body)){
if(node.classList.contains(className)){
result.push(node)
}
}
return result
}
const elements = locateAllByClassName('row')
浏览器如何优化选择查询
选择 DOM 节点是 Web 应用程序相当常见的操作。为同一个选择器多次遍历树似乎不是最佳选择。浏览器通过使用记忆优化选择。
查看 mozilla 解析器的源代码,即函数 startTag 的摘录:
@IdType String id = attributes.getId();
if (id != null) {
LocatorImpl oldLoc = idLocations.get(id);
if (oldLoc != null) {
err("Duplicate ID \u201C" + id + "\u201D.");
errorHandler.warning(new SAXParseException(
"The first occurrence of ID \u201C" + id
+ "\u201D was here.", oldLoc));
} else {
idLocations.put(id, new LocatorImpl(tokenizer));
}
}
我们可以看到这些节点 ID 保存在一个简单的哈希映射中。我们可以使用类似的方法来确保对同一 ID 的重复查询不需要完全遍历,相反,我们可以从 hashMap 中查找并返回它。
以下是我们的解决方案:
function getSelectors(){
const idLocations = {}
const classLocations = {}
function locateById(nodeId){
if(idLocations.hasOwnProperty(nodeId))
return idLocations[nodeId]
for(let node of walkPreOrder(document.body)){
if(node.id === nodeId){
idLocations[nodeId]= node
return node
}
}
idLocations[nodeId]= null
return null
}
function locateAllByClassName(className){
if(classLocations.hasOwnProperty(className))
return classLocations[className]
const result = []
for(let node of walkPreOrder(document.body)){
if(node.classList.contains(className)){
result.push(node)
}
}
classLocations[nodeId]= result
return result
}
return {
locateById,
locateAllByClassName
}
}
const {locateById, locateAllByClassName} = getSelectors();
const result = locateAllByClassName('row')
const img = locateById('profile')
处理更复杂的选择器
让我们尝试实现类似 element.querySelector 的方法。以下是 MDN 的描述:
The querySelector() method of the Element interface returns the first element that is a descendant of the element on which it is invoked that matches the specified group of selectors.
const firstRow = document.querySelector('.container .row:first-child')
在这种情况下,我们可以将任何 CSS 选择器传递给函数,它应该能够遍历 DOM 为我们找到该元素。让我们看看它是如何实现的:
function select(selector, root){
for(let node of walkPreOrder(root)){
if(node.matches(selector)){
return node
}
}
return null;
}
function myQuerySelector(path, node){
// if path is empty, nothing to find
if(path.length === 0) return null;
// if node is not provided, let's assume user wants to search within document.body
let root = node || document.body;
const selector = path[0];
// if there's only one selector in the path, just traverse using select function above
if(path.length === 1) return select(selector, root);
// else, either the current node matches the first selector in path or not
// if first selector matches with current node, look through it's children for subsequent selectors only
// else, look through it's children for the whole path
const newPath = root.matches(selector) ? path.slice(1): path;
for(let child of root.children){
const ans = myQuerySelector(newPath, child);
if(ans) return ans
}
// nothing found
return null;
}
// USAGE:
const firstRow = myQuerySelector([".container", ".row"])
myQuerySelectorAll 的实现(类似于 element.querySelectorAll)也遵循相同的方法,稍作修改:
```javascript
function selectAll(selector, root){
  let result = []
  for(let node of walkPreOrder(root)){
      if(node.matches(selector)){
        result.push(node)
     }
   }
  return result;
}

function myQuerySelectorAll(path, node){
  let result = [];
  if(path.length === 0) return result;

  let root = node || document.body;
  const selector = path[0];

  if(path.length === 1) return selectAll(selector, root);

  const newPath = root.matches(selector) ? path.slice(1): path;
  for(let child of root.children){
    result = [...result, ...myQuerySelectorAll(newPath, child)]

  }

  return result;
}
我们可以使用本文开头描述的递归前序遍历方法来克隆任何树。让我们看看我们如何使用它来克隆任何 DOM 树,类似于 element.cloneNode(true) 所做的:
- 通过创建具有相同 tagName 的新节点然后复制属性来创建源节点的克隆。
- 对源节点的所有子节点递归调用 cloneTree 方法,并将返回的节点作为子节点附加到克隆节点。
function cloneTree(node){
  if(!node) return

  const clonedNode = document.createElement(node.tagName.toLowerCase())
  const attributes = node.getAttributeNames()

  attributes.forEach(attribute => {
     clonedNode.setAttribute(attribute, node.getAttribute(attribute))
  })

  for(const child of node.children){
      clonedNode.append(cloneTree(child))
  }

  return clonedNode
}
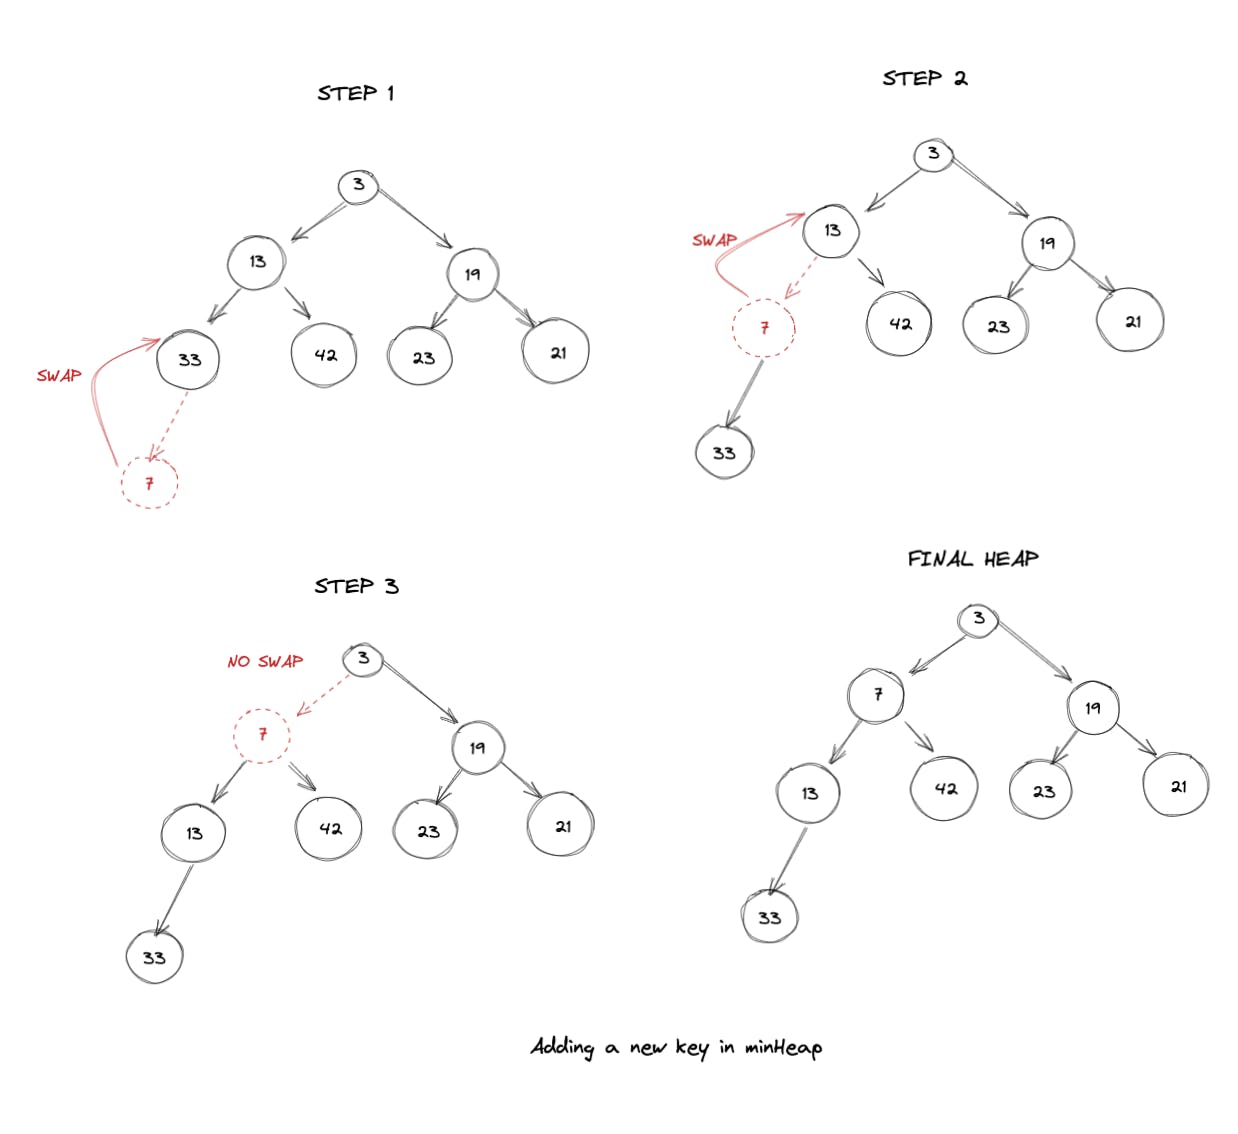
 2.每个节点都满足“堆属性”:堆属性本质上意味着对于任何给定的节点 C,如果 P 是 C 的父节点,则:
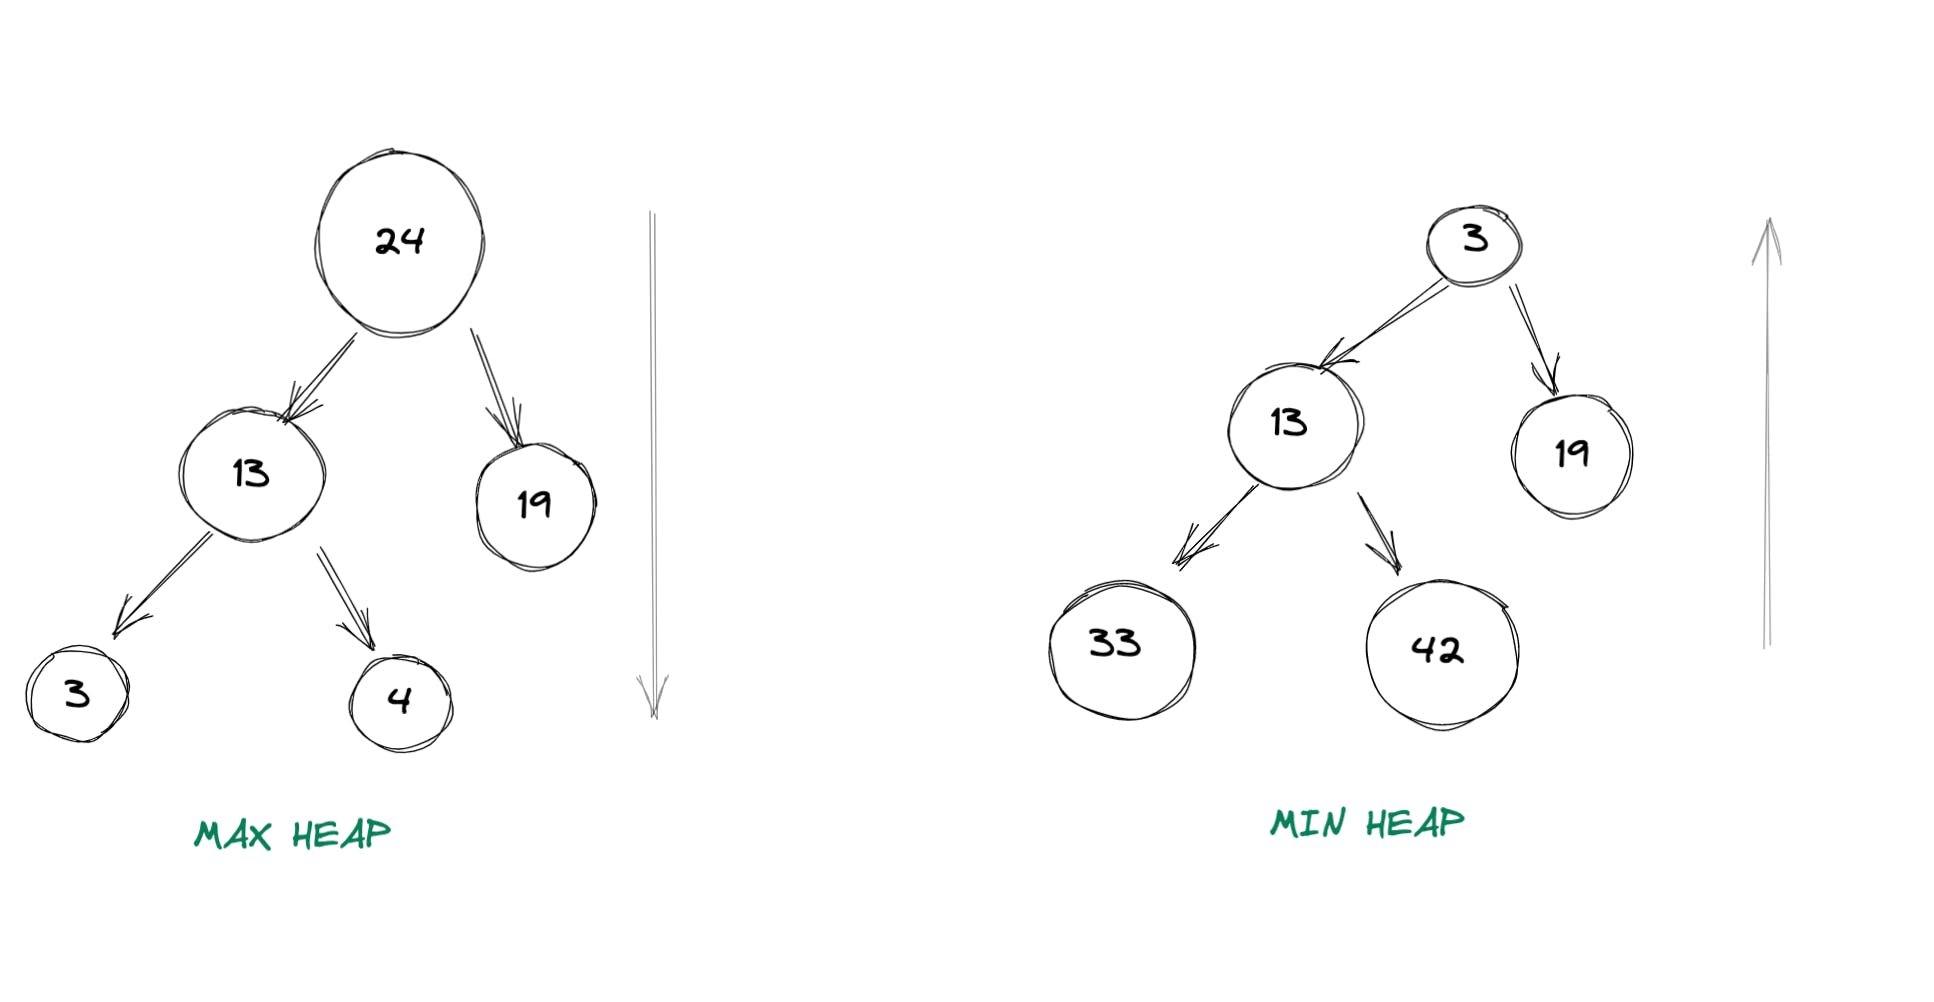
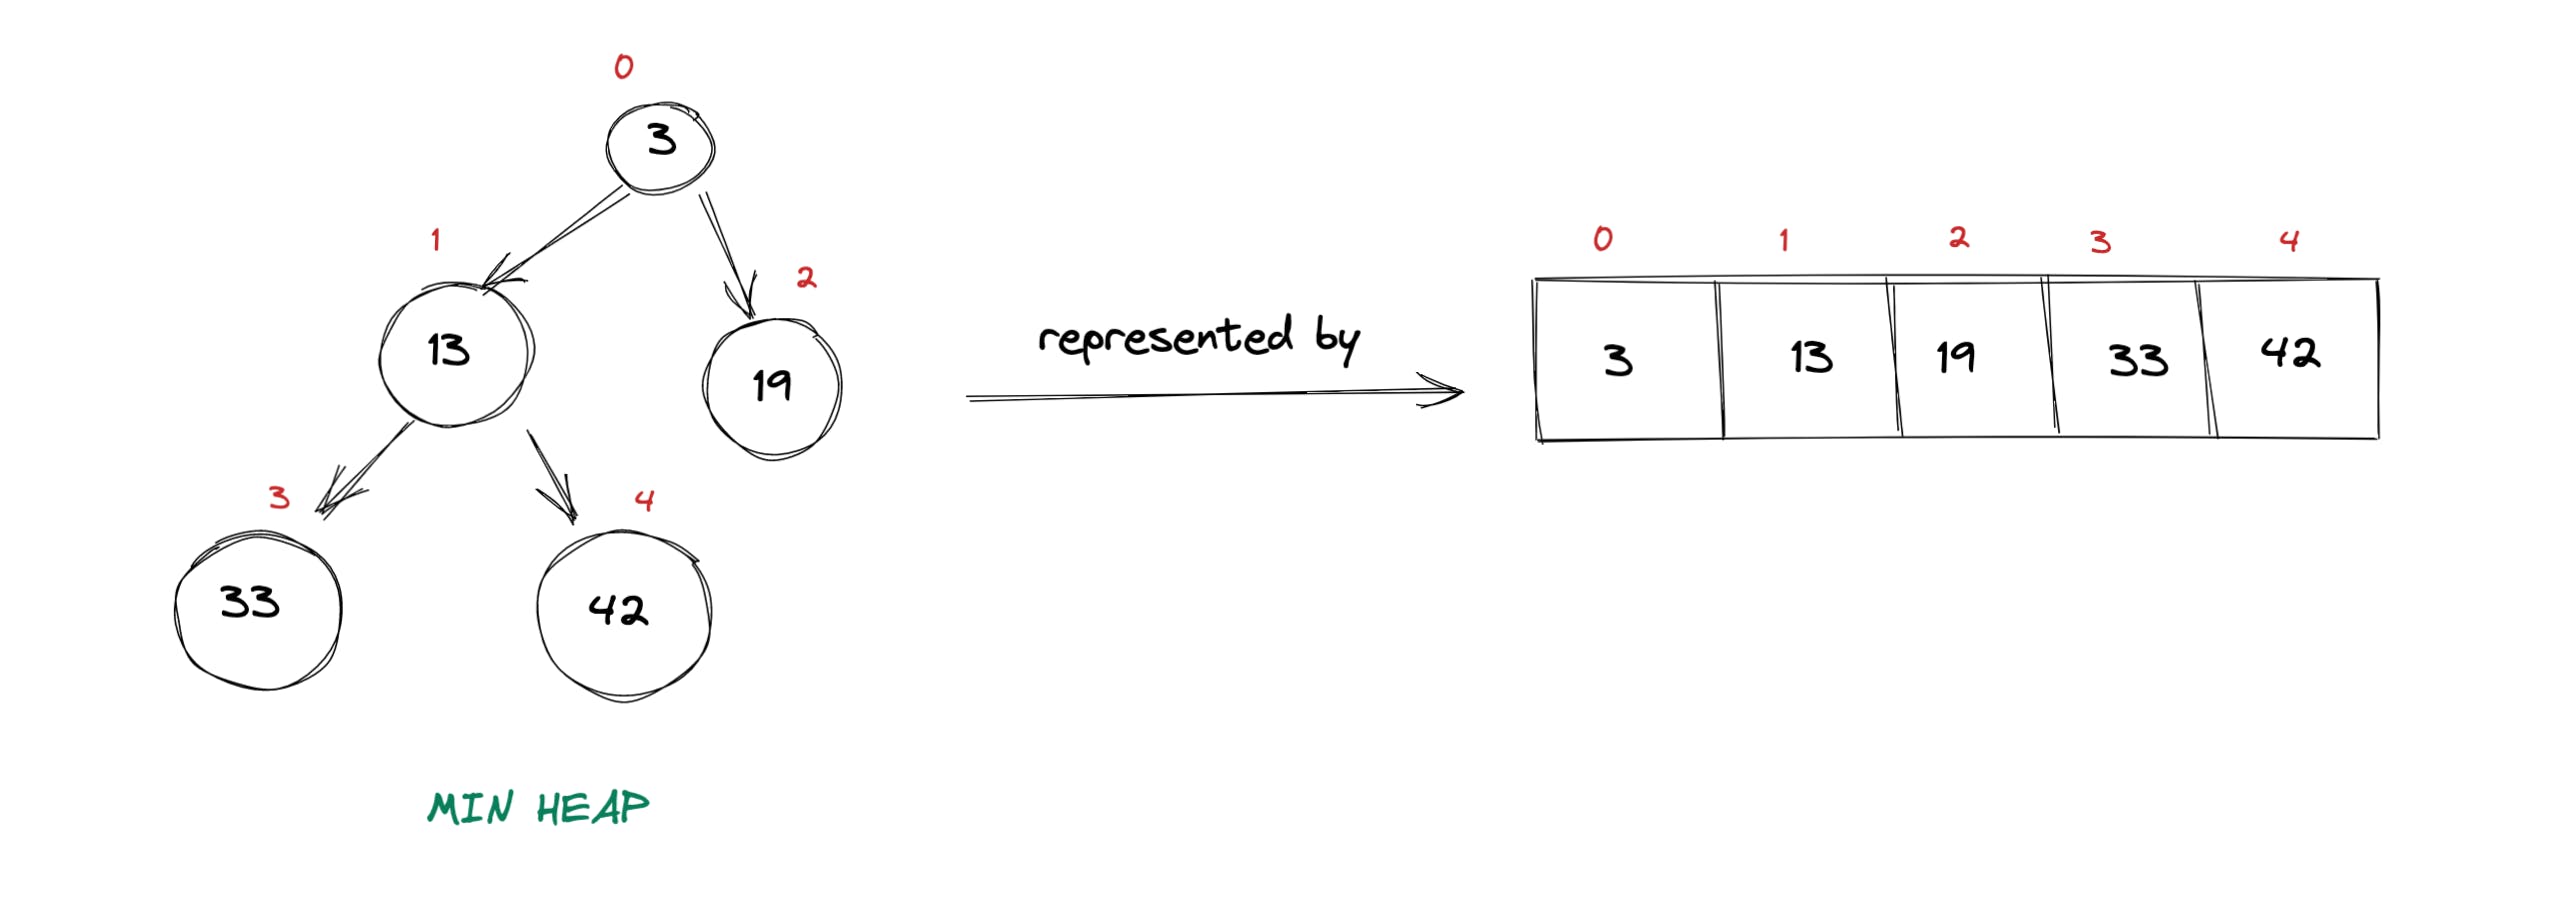 这里要注意的关键是父节点和子节点之间的关系。如果仔细观察上图,我们可以推断出以下内容:
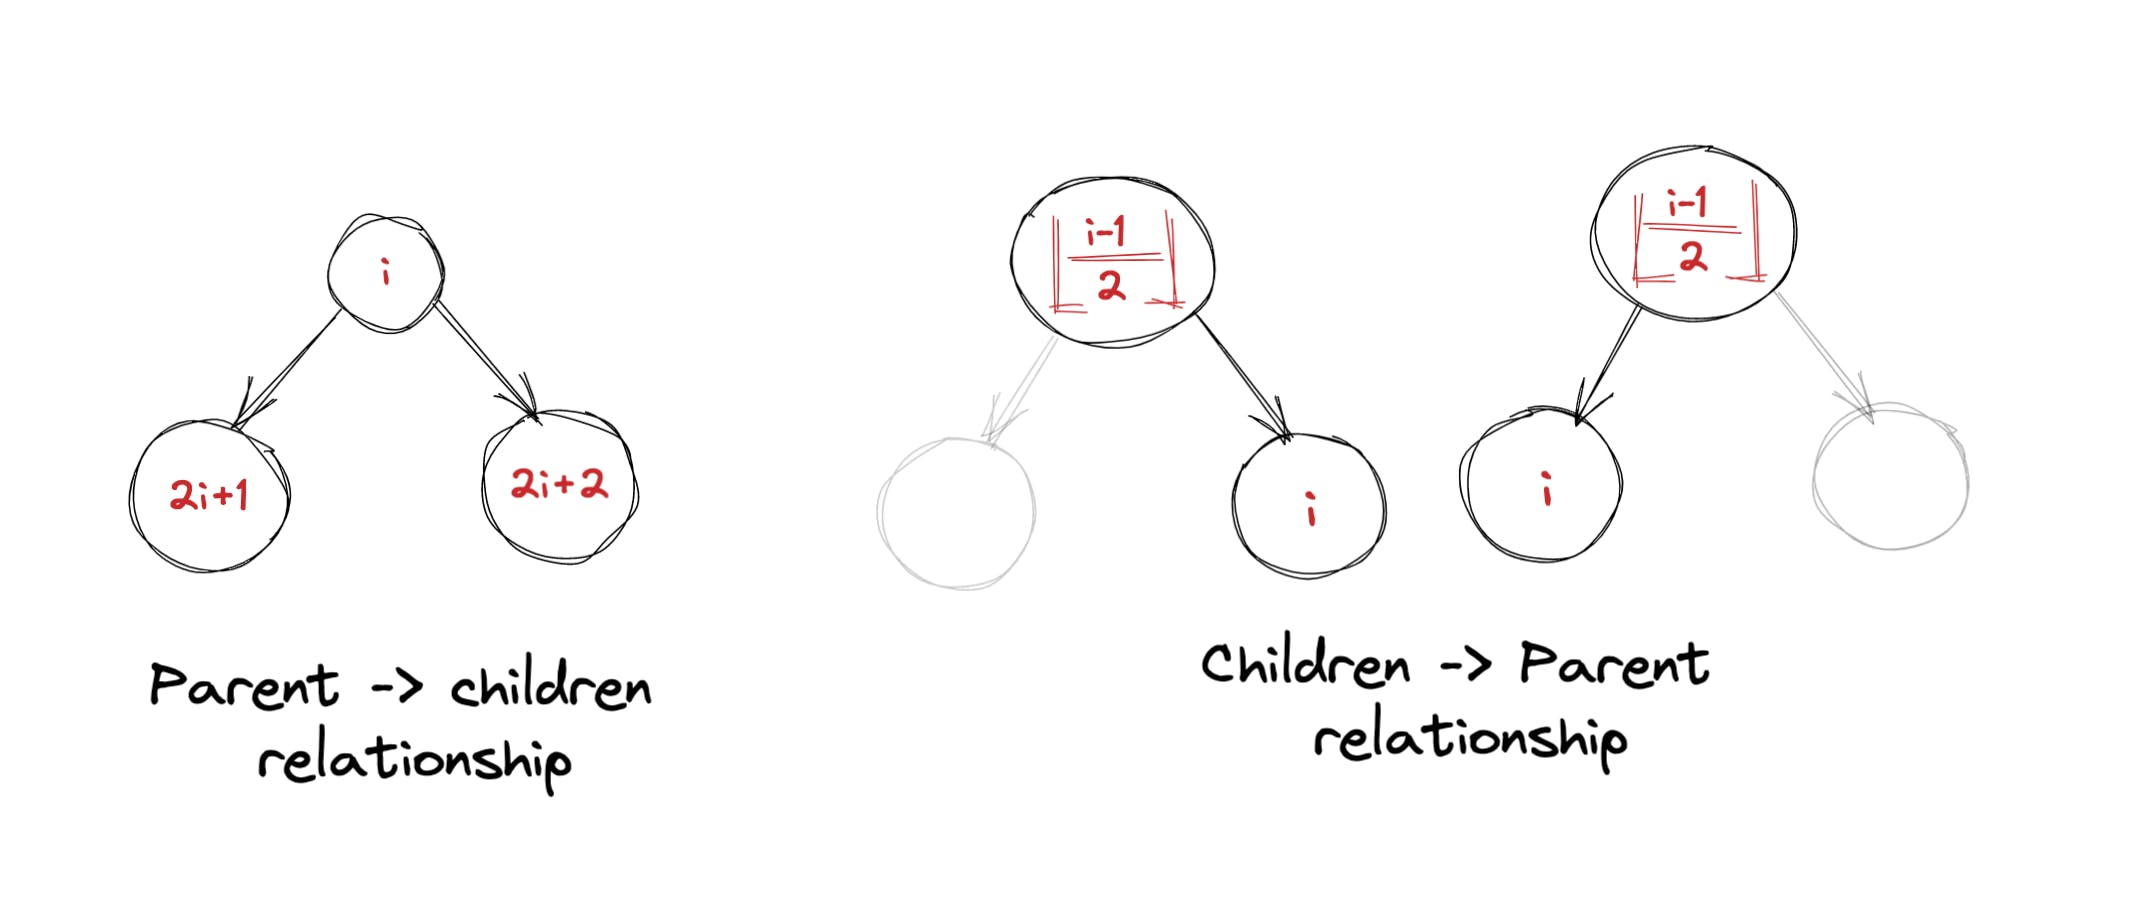
 代码如下
代码如下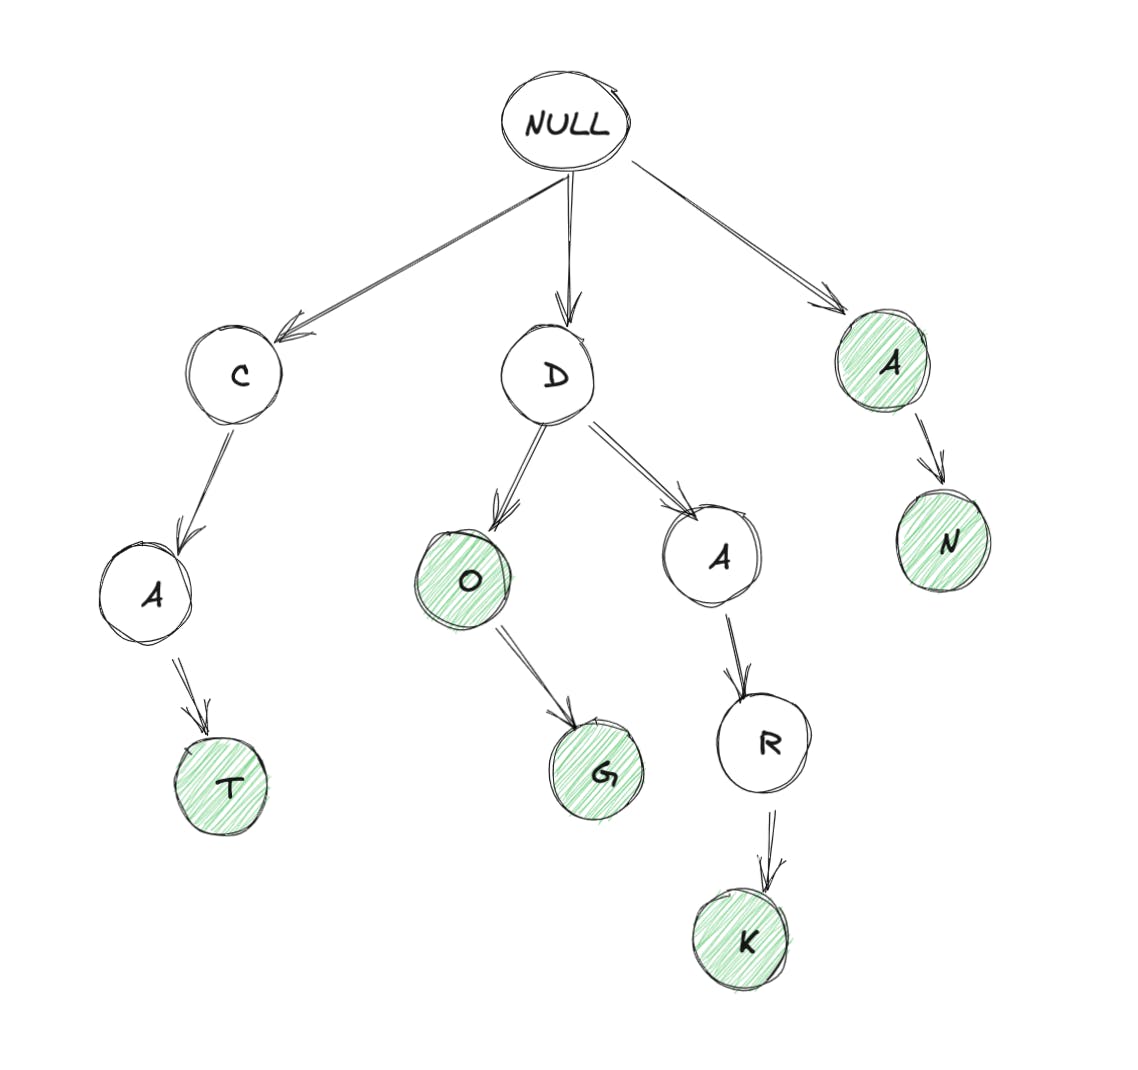 需要注意的事项:
 所以现在更有意义了。这是最终的代码: